Category: Instructions (page 1 of 1)

wild rice blend cooking instructions

Wild Rice Blend Cooking Instructions: A Comprehensive Guide

Discover the art of preparing flavorful wild rice blends, transforming simple grains into a delightful stovetop pilaf with browned fennel and seasoned chicken thighs.

This guide offers comprehensive instructions, ensuring perfectly cooked wild rice blends every time, from initial preparation to exciting serving suggestions.

Understanding Wild Rice Blends

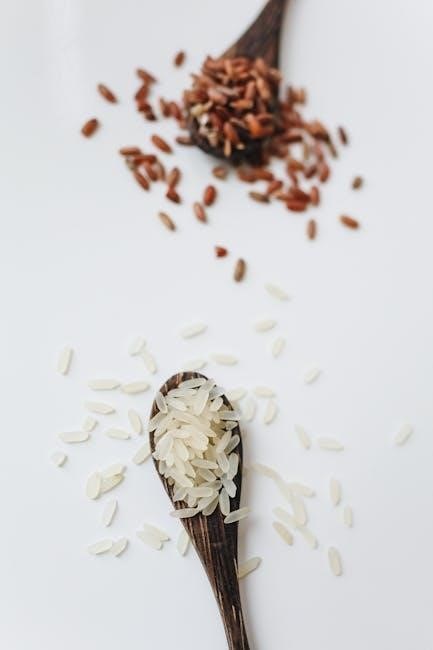
Wild rice blends are increasingly popular due to their complex flavor profiles and nutritional benefits, offering a delightful alternative to traditional white or brown rice. These blends typically combine true wild rice – which is actually a seed from aquatic grasses – with other grains like brown rice, long-grain white rice, and sometimes even barley or quinoa.

The inclusion of different grains impacts both the cooking time and the final texture. Brown rice adds a nutty chewiness, while white rice contributes a softer consistency. Understanding these variations is key to achieving optimal results. Blends often streamline the cooking process compared to using pure wild rice, which requires significantly longer simmering times.

Furthermore, pre-mixed blends ensure a balanced flavor combination, eliminating the need to source and measure individual grains. They provide a convenient and versatile base for numerous dishes, from hearty pilafs to flavorful side dishes and even salads. Exploring these blends unlocks a world of culinary possibilities.
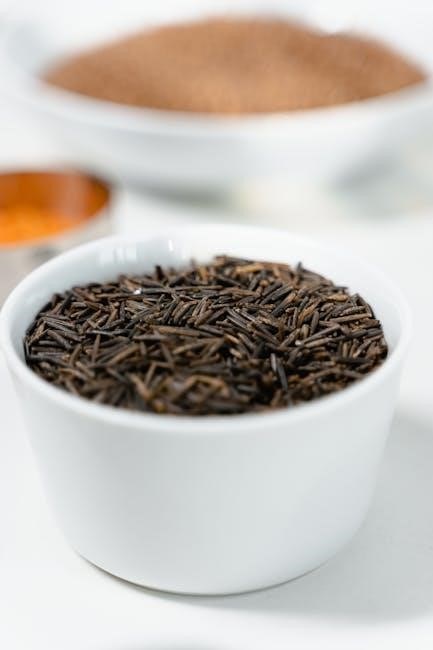
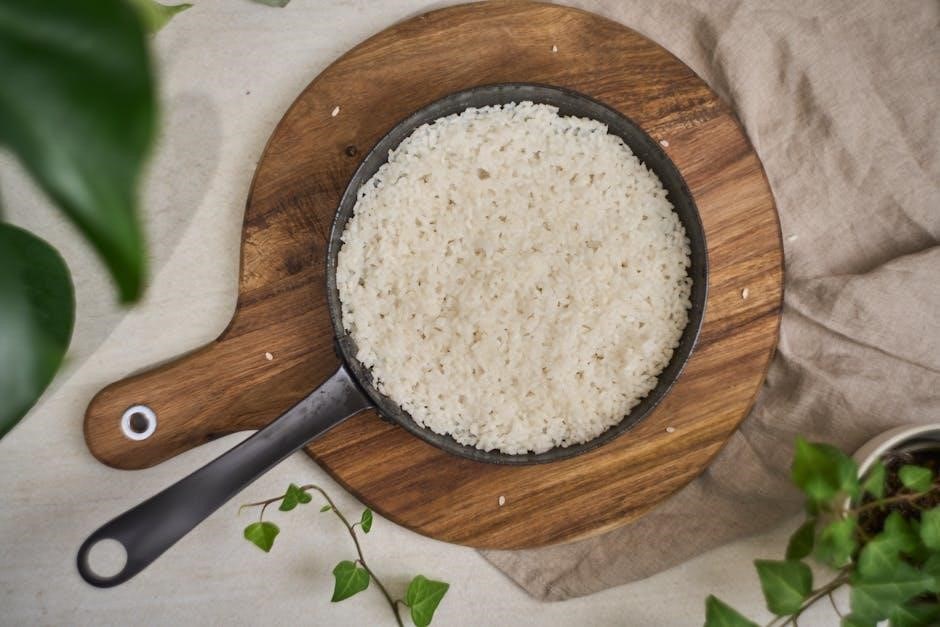
What is Wild Rice?

Contrary to its name, wild rice isn’t actually rice; it’s the seed of four aquatic grass species native to North America. Historically harvested by Indigenous peoples, it boasts a distinctive nutty flavor and a wonderfully chewy texture. These seeds grow in shallow lakes and rivers, and are traditionally hand-harvested by gently knocking them from the stalks into canoes.

Wild rice is a nutritional powerhouse, being a complete protein and rich in fiber, vitamins, and minerals. Its dark brown or black color indicates a higher concentration of antioxidants. The unprocessed grain requires a longer cooking time than white rice, but the resulting flavor and texture are well worth the effort.

When purchasing, look for whole grains rather than processed or parboiled varieties to maximize nutritional benefits. Understanding its origins and unique characteristics enhances appreciation for this versatile and flavorful ingredient.

Types of Wild Rice Blends Available

The market offers a diverse range of wild rice blends, catering to various tastes and culinary needs. Commonly, wild rice is combined with long-grain white rice, brown rice, or even red rice to create balanced flavor profiles and textures. These blends often shorten the overall cooking time compared to using pure wild rice.

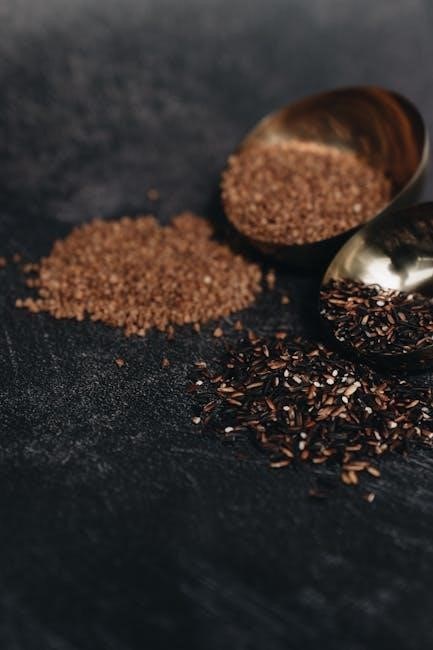
Some blends incorporate other grains like quinoa or barley, adding further nutritional value and textural complexity. You can also find blends seasoned with herbs and spices, offering convenient flavor combinations. Pre-seasoned options might include savory blends with mushrooms, garlic, or even smoked paprika.

Choosing a blend depends on your preference; blends with white rice are milder, while those with brown rice retain a nuttier taste. Experimenting with different combinations allows you to discover your perfect wild rice experience.

Preparing Wild Rice Blends for Cooking

Before embarking on your culinary journey with wild rice blends, proper preparation is key to achieving optimal results. Begin by carefully examining the package instructions, as cooking times can vary depending on the specific blend and grain composition. Understanding the blend’s components – wild rice, white rice, brown rice, or others – will guide your approach.

Generally, most blends benefit from a preliminary step to enhance their texture and flavor. This involves gently rinsing the rice under cold water to remove excess starch, contributing to a fluffier final product. Sorting through the blend to remove any unwanted debris or broken grains is also recommended.

While not always necessary, soaking the blend for 30-60 minutes can further reduce cooking time and improve tenderness.

Rinsing and Sorting

Rinsing your wild rice blend is a crucial step often overlooked, yet it significantly impacts the final texture. Place the uncooked blend in a fine-mesh sieve and rinse under cold, running water. Gently agitate the rice with your hand to release excess starch, continuing until the water runs clear. This process prevents stickiness during cooking, resulting in beautifully separated grains.

Simultaneously with rinsing, sorting the blend is highly recommended. Spread the rinsed rice in a thin layer on a light-colored surface. Inspect for any small stones, bits of chaff, or broken grains. While commercially packaged blends are generally clean, this step ensures a pleasant dining experience, free from unwanted surprises.

Removing these impurities guarantees a refined and enjoyable wild rice dish.

Soaking (Optional)

While not strictly necessary, soaking your wild rice blend can significantly reduce cooking time and improve its texture. To soak, place the rinsed blend in a bowl and cover with several cups of cold water. Allow it to soak for at least 4 hours, or ideally overnight, in the refrigerator.

Soaking helps to rehydrate the grains, allowing them to absorb water more efficiently during cooking. This results in a more tender and evenly cooked final product. If you choose to soak, remember to drain and rinse the blend again before proceeding with your chosen cooking method.

Consider soaking if you’re short on time or prefer a softer, more yielding texture in your wild rice blend.

Cooking Methods for Wild Rice Blends

Explore versatile techniques – classic stovetop simmering, efficient Instant Pot pressure cooking, and flavorful oven baking – to unlock the full potential of your blend.

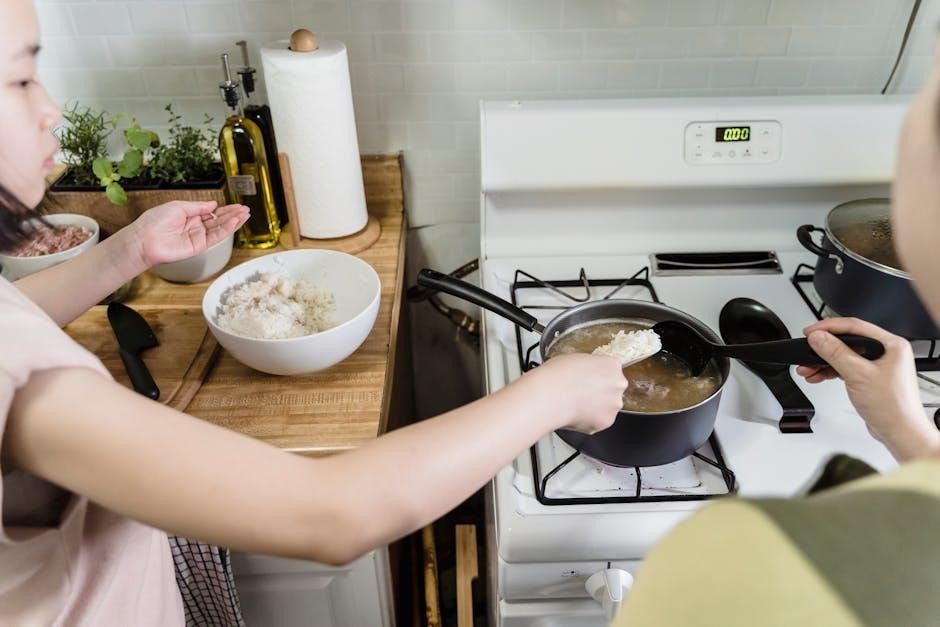
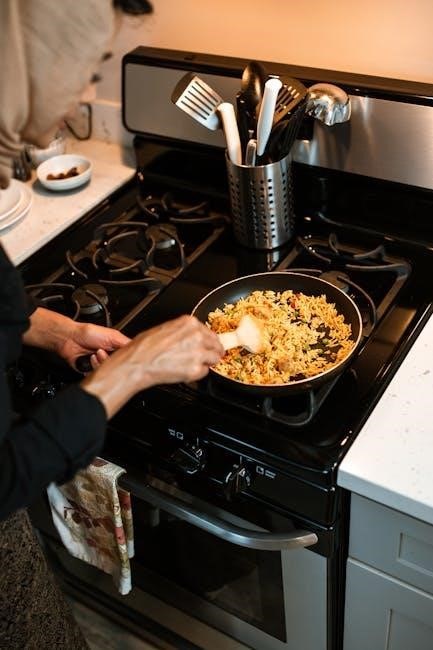
Stovetop Cooking: The Classic Approach

The stovetop method remains a beloved way to cook wild rice blends, offering direct control over the process and yielding wonderfully textured results. Achieving the perfect pilaf requires attention to detail, starting with the correct liquid ratio.

Generally, a 3:1 liquid-to-rice ratio is recommended, though slight adjustments may be needed based on the specific blend. Bring the water or broth to a boil, then add the rinsed wild rice blend. Once boiling, reduce the heat to a gentle simmer, cover the pot tightly, and allow the rice to cook undisturbed.

Cooking time typically ranges from 45 to 60 minutes, or until the grains have burst open and are tender yet slightly chewy. Avoid lifting the lid during cooking, as this releases steam and can prolong the process. Once cooked, fluff with a fork and let stand for 5-10 minutes before serving to allow the flavors to meld.

Water/Broth Ratio

Determining the ideal liquid-to-rice ratio is crucial for perfectly cooked wild rice blends. A standard recommendation is 3 cups of liquid for every 1 cup of wild rice blend, ensuring sufficient moisture for proper hydration and expansion of the grains.

However, this ratio can be subtly adjusted based on personal preference and the specific blend composition. For a softer texture, slightly increase the liquid to 3.5:1. Conversely, for a chewier result, reduce it to 2.75:1. Using broth instead of water significantly enhances the flavor profile, imparting a richer, more savory taste to the finished dish.

Chicken or vegetable broth are excellent choices, complementing the nutty flavor of the wild rice. Remember to account for any additional seasonings dissolved in the broth when adjusting salt levels later in the cooking process.

Cooking Time & Simmering

Typically, wild rice blends require a longer cooking time compared to white rice, generally ranging from 45 to 60 minutes on the stovetop. Begin by bringing the water or broth to a rolling boil, then immediately reduce the heat to the lowest possible setting – a gentle simmer is key.

Cover the pot tightly to trap steam and maintain a consistent temperature. Avoid lifting the lid frequently, as this releases steam and prolongs the cooking process. After the initial simmering period, check the rice for tenderness. The grains should be plump and slightly split, with a chewy texture.

If the rice is still firm, continue simmering for another 10-15 minutes, checking periodically. Once cooked, remove from heat and let it stand, covered, for 10 minutes to allow the steam to redistribute and finish the cooking process.

Instant Pot/Pressure Cooker Method

Utilizing an Instant Pot or pressure cooker dramatically reduces the cooking time for wild rice blends, offering a convenient and efficient alternative to stovetop methods. This method excels at creating perfectly tender and flavorful rice with minimal effort.

Combine the wild rice blend with water or broth in the Instant Pot. A typical ratio is 1 cup of rice to 3 cups of liquid, though adjustments may be needed based on your specific blend. Secure the lid, ensuring the valve is set to sealing.

Pressure cooking unlocks a faster, more consistent result. The Instant Pot method preserves the nutty flavor and chewy texture that makes wild rice so appealing, delivering a delicious side dish in a fraction of the time.

Pressure Cooking Time

For most wild rice blends, a pressure cooking time of 20-25 minutes is optimal. This timeframe allows the grains to fully absorb the liquid and achieve a tender yet slightly chewy texture. However, cooking times can vary slightly depending on the specific blend composition and your desired level of tenderness.

It’s crucial to remember that the Instant Pot requires time to come up to pressure before the timer begins. Factor in approximately 10-15 minutes for the pot to reach full pressure. Once the cooking cycle is complete, you’ll need to decide between a natural pressure release or a quick release.

Experimenting with these timings will help you fine-tune the process to your preferences, consistently yielding perfectly cooked wild rice blends.

Natural Pressure Release vs. Quick Release

Choosing between a natural pressure release (NPR) and a quick release (QR) significantly impacts the final texture of your wild rice blend. A natural pressure release allows the pressure to dissipate gradually over 15-20 minutes, resulting in more evenly cooked and tender grains.

This method is generally recommended for wild rice blends as it prevents the grains from becoming mushy or breaking apart. Conversely, a quick release involves manually releasing the pressure immediately after cooking, which can be faster but may lead to a slightly less consistent texture.

For optimal results, especially with wild rice, prioritize the natural pressure release. It ensures a fluffy, flavorful outcome, maximizing the delightful chewiness inherent in this unique grain.

Oven Baking Method

The oven baking method offers a hands-off approach to cooking wild rice blends, ideal for those seeking a convenient and flavorful result. This technique allows for gentle, even cooking, enhancing the nutty notes of the rice and any accompanying ingredients.

To begin, combine the wild rice blend with liquid in an oven-safe dish. Covering the dish tightly is crucial to prevent excessive evaporation and ensure proper steaming. The baking process transforms the grains into a tender, aromatic side dish or base for a hearty pilaf.

This method is particularly well-suited for incorporating vegetables and proteins directly into the cooking process, creating a complete and satisfying meal with minimal effort.

Liquid to Rice Ratio for Baking

Achieving the perfect texture when baking wild rice blends hinges on the correct liquid-to-rice ratio. Generally, a ratio of 2.5 to 3 cups of liquid for every 1 cup of wild rice blend is recommended. This ensures the rice cooks through completely without becoming mushy or remaining overly firm.

The type of liquid used also impacts the final result; broth adds a richer flavor profile compared to water. Adjust the ratio slightly based on your preference – use less liquid for a chewier texture and more for a softer consistency.

Remember to account for any additional ingredients added to the baking dish, as they will also absorb liquid during the cooking process. Careful measurement is key to a successful and delicious baked wild rice blend.

Baking Temperature and Duration

For optimal results when baking wild rice blends, a consistent oven temperature of 375°F (190°C) is generally recommended. This temperature allows the rice to cook evenly and develop a slightly nutty flavor without drying out prematurely.

The baking duration typically ranges from 60 to 75 minutes, but it’s crucial to check for doneness around the 60-minute mark. The rice should be tender and the liquid should be fully absorbed. If needed, continue baking for another 15 minutes, checking every few minutes.

Covering the baking dish for the first 45 minutes helps retain moisture, then uncovering it for the remaining time allows the top to lightly toast. Always allow the baked wild rice blend to rest for 10 minutes before serving.

Flavor Enhancements & Serving Suggestions

Elevate your wild rice blend with flavorful broth, diverse seasonings, and delightful pairings like chicken thighs and sweet, gently simmered fennel wedges.

Adding Broth vs. Water

Choosing between broth and water significantly impacts the final flavor profile of your wild rice blend. While water provides a neutral base, allowing the natural nutty flavor of the rice to shine, broth introduces a depth of savory complexity.

Chicken broth, in particular, complements wild rice beautifully, as evidenced by recipes featuring chicken thighs simmered directly within the blend. Vegetable or mushroom broth also offer excellent alternatives, adding umami and earthiness.

Consider the other ingredients you’re incorporating; if using seasoned chicken or flavorful vegetables like fennel, water might be preferable to avoid overpowering the dish. Conversely, a simple blend benefits greatly from the richness of a good quality broth.

Experimentation is key! Start with broth for a more robust flavor, and water for a cleaner taste, adjusting to your personal preference and the overall recipe composition.

Seasoning Options

Elevate your wild rice blend with a thoughtful selection of seasonings. Simple salt and pepper are foundational, but don’t hesitate to explore more complex flavor combinations. Herbs like thyme, rosemary, and sage pair wonderfully with the nutty notes of wild rice, adding an aromatic dimension.

Spices such as smoked paprika, garlic powder, or a pinch of cayenne pepper can introduce warmth and subtle heat. Consider incorporating bay leaves during cooking for a delicate, savory undertone – remember to remove them before serving!

For a brighter flavor, a squeeze of lemon juice or a sprinkle of fresh parsley after cooking can be incredibly refreshing. When cooking with chicken, seasonings like Italian herb blends or poultry seasoning complement the meat beautifully.

Ultimately, seasoning is a personal preference; start conservatively and taste as you go, adjusting to achieve your desired flavor intensity.

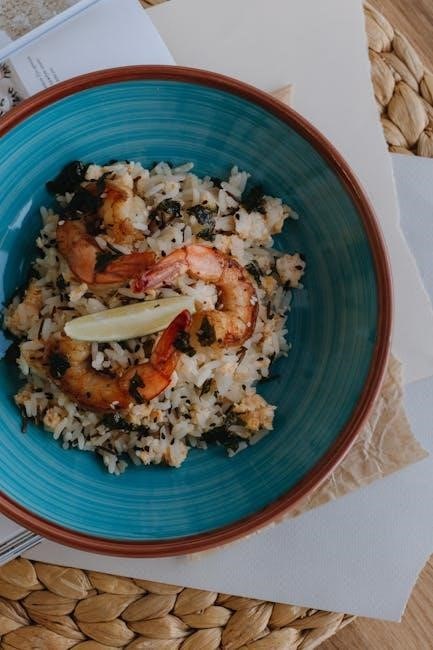
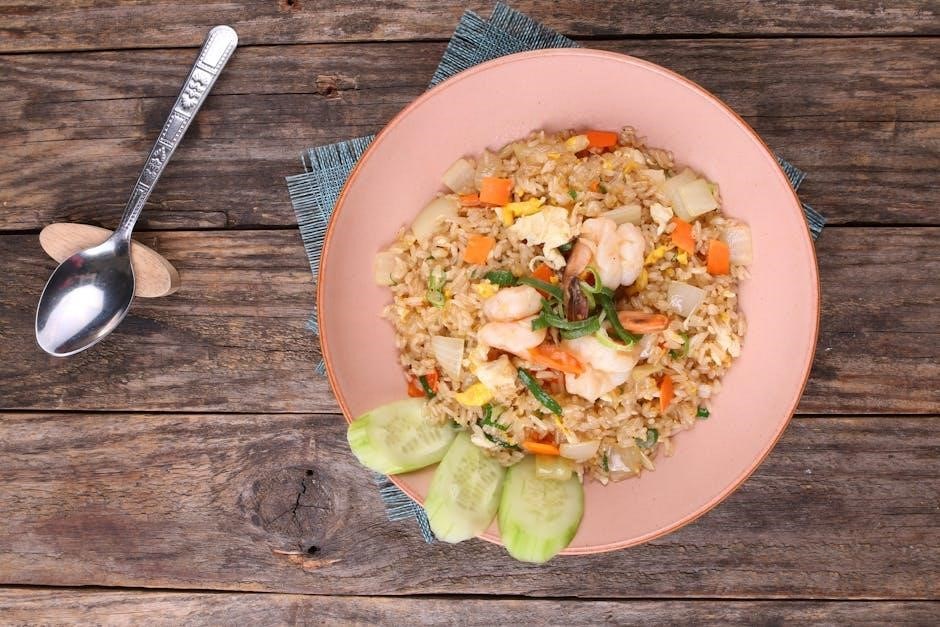
Serving Suggestions & Pairings

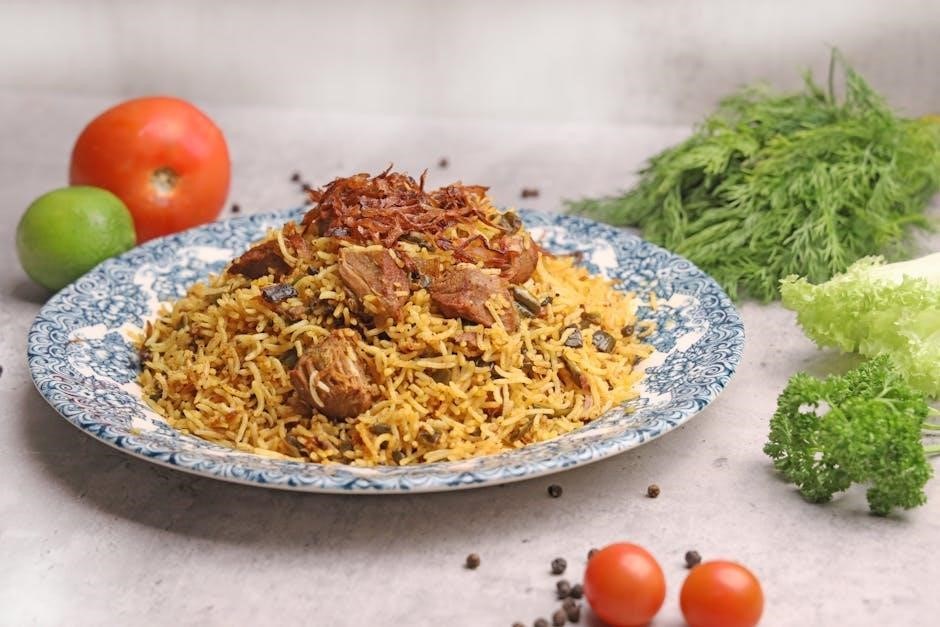
Wild rice blends are incredibly versatile, lending themselves to a wide array of culinary applications. As demonstrated, they create a fantastic base for one-pot pilafs, particularly when paired with chicken thighs and vegetables like browned fennel, offering a complete and satisfying meal.

Consider serving wild rice alongside roasted meats such as turkey, duck, or pork, where its earthy flavor complements richer proteins. It also makes a delightful stuffing for poultry or mushrooms.

Vegetarian options abound – pair it with roasted root vegetables, grilled halloumi, or a hearty lentil stew. A dollop of crème fraîche or a sprinkle of toasted nuts adds a luxurious finishing touch.

For a lighter meal, incorporate wild rice into salads with dried cranberries, pecans, and a citrus vinaigrette.

motorola walkie talkie instructions manual

Welcome to the Motorola Walkie Talkie Instructions Manual. This comprehensive guide provides detailed setup, usage, and troubleshooting tips for optimal performance. Perfect for both new and experienced users.

1.1 Overview of the Manual

This manual provides a comprehensive guide for Motorola walkie-talkie users, covering essential topics like installation, operation, and maintenance. It includes detailed instructions for setting up channels, adjusting settings, and troubleshooting common issues. Designed for both novice and experienced users, the manual ensures safe and effective use of the device. Key features, safety guidelines, and optimal usage tips are highlighted to enhance your communication experience.

1.2 Importance of Reading the Manual

Reading the Motorola Walkie Talkie manual is crucial for understanding safety guidelines, proper operation, and maximizing device features. It ensures compliance with RF exposure limits and helps users avoid potential hazards. The manual provides troubleshooting tips and maintenance advice, enhancing performance and longevity. Whether you’re a new or experienced user, this guide is essential for safe, effective, and optimal use of your Motorola walkie-talkie.

Safety Precautions and RF Exposure Guidelines

Understanding RF energy exposure is vital for safe usage. Follow guidelines to avoid hazards and ensure compliance with safety standards. Proper handling prevents risks and optimizes performance.

2.1 Understanding RF Energy Exposure

RF energy exposure guidelines are crucial for safe usage of Motorola walkie talkies. These devices emit low levels of radiofrequency energy, regulated by safety standards. Proper handling, such as using approved accessories and maintaining a distance from the body during transmission, minimizes exposure risks. Always follow the provided safety guide to ensure compliance and optimal performance. Understanding these guidelines helps users operate the device responsibly and safely.

2;2 Safety Tips for Using Walkie Talkies

Ensure safe usage by following essential guidelines. Always read the RF Energy Exposure and Product Safety Guide. Use only approved Motorola accessories to maintain compliance. Avoid exposing the device to water or extreme temperatures. Keep the walkie talkie away from children and flammable materials. Handle antennas with care to prevent damage. Follow proper charging procedures and avoid overcharging. By adhering to these tips, you ensure responsible usage and optimal device performance.

Contents of the Manual Package

The manual package includes the Motorola walkie-talkie unit, rechargeable batteries, charger, antenna, belt clip, and a comprehensive user guide for easy setup and operation.

3.1 What’s Included in the Box

The Motorola walkie-talkie package includes the radio unit, rechargeable batteries, a charger, antenna, belt clip, and a detailed user manual. Additional accessories like speaker microphones and earpieces may be available, depending on the model. This comprehensive setup ensures you have everything needed for immediate use and optimal performance.

3.2 Accessories and Optional Equipment

Motorola walkie-talkies offer a range of accessories to enhance functionality. These include speaker microphones, earpieces, and headsets for discreet communication; Additional items like car chargers, desktop chargers, and carry cases provide convenience. Optional equipment such as extended batteries and antenna upgrades can improve performance. These accessories ensure tailored solutions for various user needs, whether for personal, professional, or outdoor use.

Installation and Setup

Install batteries, charge the device, and complete initial setup. Follow manual instructions for proper configuration to ensure optimal performance and functionality of your Motorola walkie-talkie.

4.1 Battery Installation and Charging

Insert the batteries by aligning the positive and negative terminals correctly. Use the provided charging dock or USB cable for charging. Ensure the walkie-talkie is turned off during charging. Allow 12-24 hours for a full charge; Avoid overcharging to prolong battery life. Always use Motorola-approved batteries and chargers for optimal performance and safety. Refer to the manual for specific charging instructions and guidelines.

4.2 Initial Setup and Configuration

Turn on your Motorola walkie-talkie by pressing and holding the power button. Navigate through the menu to set your preferred language, display settings, and backlight preferences. Use the keypad to input your desired channel and sub-code. Set the date and time if required. Save your settings to ensure proper functionality. Refer to the manual for detailed instructions on configuring advanced features and pairing devices for seamless communication.

Basic Operations

Learn to turn your Motorola walkie-talkie on/off, adjust volume levels, and master basic communication techniques for seamless connectivity. Essential steps for everyday use are clearly outlined.

5.1 Turning the Radio On/Off

To turn your Motorola walkie-talkie on, press and hold the power button until the LED indicator lights up. Release the button once the radio is active. To turn it off, press and hold the same button until the LED turns off. Ensure the device is powered off when not in use to conserve battery life. This simple process ensures efficient operation and extends the product’s longevity.

5.2 Adjusting Volume Levels

Adjust the volume on your Motorola walkie-talkie by pressing the volume up (+) or down (-) buttons. The LED will indicate the current volume level. For optimal communication, set the volume to a comfortable level that ensures clear audio without distortion. Proper volume adjustment enhances listening clarity and helps maintain effective communication in various environments. This feature is essential for both personal and professional use, ensuring clear voice transmission and reception.

5.3 Basic Communication Techniques

Mastering basic communication techniques ensures effective use of your Motorola walkie-talkie. Always set the same channel and sub-code on all devices for clear transmission. Speak clearly into the microphone, holding it 2-3 inches from your mouth. Use the push-to-talk (PTT) button to start and end transmissions. Avoid interrupting others and wait for confirmation before responding. These practices minimize interference and ensure seamless communication, enhancing overall user experience and efficiency in various settings.

Advanced Features and Settings

Explore advanced features like channel programming, sub-code settings, and scanning options to enhance communication efficiency and customization, ensuring tailored use for various environments and preferences.

6.1 Channel Selection and Programming

Channel selection and programming allow users to customize their Motorola walkie-talkie experience. Models like the T42, T6200, and T6220 operate on FRS/GMRS frequencies, offering multiple channels for clear communication. Users can manually select channels or program them using the keypad and menu options. This feature ensures compatibility with other devices and enhances communication efficiency in various environments. Proper programming is essential for optimal performance and interference-free connectivity.

6.2 Sub-Code and Privacy Settings

Motorola walkie-talkies feature sub-code settings to enhance privacy and reduce interference. By selecting a unique sub-code, users can filter out unwanted transmissions, ensuring only intended communications are received. This feature is particularly useful in busy environments or when multiple groups are using the same channel. Properly setting sub-codes requires syncing with other users to maintain seamless and private communication, as detailed in the manual.

6.3 Scanning and Monitoring Features

Motorola walkie-talkies offer advanced scanning and monitoring capabilities to efficiently manage communications. The scan feature allows users to automatically search for active channels, ensuring quick connection to ongoing conversations. Monitoring features enable real-time tracking of multiple channels, reducing missed transmissions. These functions enhance productivity and streamline communication, especially in environments with high radio traffic, as detailed in the manual for optimal setup and usage.

Customization and Personalization

Motorola walkie-talkies allow users to customize settings like channels, audio tones, and keypad locks. Personalize your device to suit individual preferences or specific communication needs effectively.

7.1 Setting Up Custom Channels

Setting up custom channels on your Motorola walkie-talkie allows personalized communication preferences. Access the menu, select the channel option, and choose from available frequencies or pre-programmed settings. For models like the T42 or T6200, use the keypad to input specific codes. Ensure all devices in your group are set to the same channel for seamless communication. This feature enhances privacy and efficiency, ideal for both personal and professional use.

7.2 Adjusting Audio and Sound Settings

Adjusting audio and sound settings on your Motorola walkie-talkie ensures clear communication. Use the volume control to optimize sound levels based on your environment. For models like the T42 or T6200, press the volume button until the desired level is reached. You can also enable voice clarity features to enhance call quality. Additionally, adjust the squelch setting to minimize background noise and interference, ensuring crisp and distortion-free audio for effective conversations.

7.3 Using the Keypad Lock Function

The keypad lock function prevents accidental button presses, ensuring your Motorola walkie-talkie settings remain unchanged. To activate, press and hold the lock button until a confirmation tone sounds or the LED flashes. This feature is especially useful during outdoor activities or in busy environments. While locked, only emergency buttons may function, maintaining safety. Refer to your model-specific manual, such as the T42 or T6200, for exact instructions on enabling and disabling this feature.

Troubleshooting Common Issues

Resolve connectivity, audio, and battery issues with step-by-step solutions. Ensure proper channel alignment, volume settings, and battery maintenance for optimal performance. Refer to the manual for detailed fixes.

8.1 Resolving Connectivity Problems

Ensure both devices are on the same channel and privacy code. Check for physical obstructions or distance limits. Verify antenna orientation and battery levels. Reset the device if necessary. Consult the manual for channel realignment and interference reduction tips. If issues persist, perform a hard reset or update firmware. Proper alignment and settings ensure reliable communication.

8.2 Fixing Audio and Sound Issues

Check volume levels and ensure the speaker is not obstructed. Verify the antenna is properly attached for clear reception. Clean the speaker grille to remove debris. If static or distortion occurs, adjust the channel or sub-code. Reset the device to factory settings if issues persist. Ensure firmware is updated for optimal performance. Proper maintenance and settings can resolve most audio-related problems effectively.

8.3 Battery and Charging Troubleshooting

Ensure the battery is properly installed and charged. Check for loose connections or dirt on contacts. Use the original charger to avoid compatibility issues; If the battery drains quickly, adjust settings to reduce power consumption. Avoid overcharging, as it may degrade battery life. If issues persist, reset the device or update firmware. For severe problems, contact Motorola support or replace the battery if necessary.

Maintenance and Care

Regularly clean the device with a soft cloth and avoid harsh chemicals. Store in a dry, cool place to prevent damage. Update firmware for optimal performance.

9.1 Cleaning the Walkie Talkie

Regular cleaning ensures optimal performance and longevity. Use a soft, dry cloth to wipe the exterior and remove dirt or debris. For stubborn stains, lightly dampen the cloth with water, but avoid harsh chemicals or excessive moisture. Clean the antenna and speaker grilles gently to maintain clear communication. Avoid submerging the device in water or exposing it to extreme temperatures. Refer to the manual for specific cleaning solutions or recommendations.

9.2 Storing the Device Properly

Store your Motorola walkie talkie in a cool, dry place to prevent damage. Use the original packaging or a protective case to avoid scratches. Keep the device away from extreme temperatures, moisture, or direct sunlight. Ensure the battery is fully charged or removed before storage to prevent degradation. Regularly inspect the device for dust or debris and clean it gently before storing. Proper storage extends the lifespan and maintains optimal performance.

9.3 Updating Firmware and Software

Regularly update your Motorola walkie talkie’s firmware and software to ensure optimal performance and access to new features. Visit Motorola’s official website to download the latest updates. Use a compatible USB cable to connect the device to your computer and follow the on-screen instructions. Always back up your settings before updating. Keep your radio up-to-date to maintain functionality, security, and compatibility with other devices. Updates may improve audio quality, battery life, and overall user experience.

Warranty and Support Information

Understand your Motorola walkie talkie’s warranty terms and explore support options. Contact Motorola Solutions for assistance, or locate authorized service centers for repairs and maintenance.

10.1 Understanding the Warranty Terms

Motorola walkie talkies come with a limited warranty covering manufacturing defects for a specified period. The warranty typically includes repair or replacement of defective parts. Review the terms to understand coverage duration, conditions, and exclusions. Contact Motorola Support for warranty-related inquiries or to locate authorized service centers for assistance. Proper registration and adherence to usage guidelines may be required to maintain warranty validity.

10.2 Contacting Motorola Support

For assistance with your Motorola walkie talkie, contact Motorola Support through their official website, phone, or email. Visit the Motorola Solutions website to find regional contact details and support options. Live chat and online forums are also available for quick inquiries. Ensure you have your product model and serial number ready for efficient support. Additionally, authorized service centers can be located through the website for in-person assistance.

10.3 Finding Authorized Service Centers

To locate an authorized Motorola service center, visit the official Motorola Solutions website and use the service center locator tool. Enter your location or product details to find nearby centers. Ensure your device is serviced by certified professionals for genuine parts and warranty compliance. Contact Motorola Support for assistance in finding the nearest authorized center.

Frequently Asked Questions (FAQs)

Explore common questions about Motorola Walkie Talkie usage, troubleshooting, and maintenance. Find answers to issues like connectivity, audio problems, and battery life optimization.

11.1 Common Questions About Usage

Users often ask about range, licensing, and battery life. Motorola Walkie Talkies typically cover up to 35 miles under ideal conditions. FRS models don’t require a license, while GMRS models do. For optimal performance, ensure proper antenna orientation and avoid obstacles. Charging times vary by model, but most take 8-12 hours. Programming channels and sub-codes can enhance privacy. Refer to your manual for specific model details and troubleshooting tips.

11.2 Troubleshooting FAQs

Common issues include poor connectivity, static, or no sound. Check if both radios are on the same channel and sub-code. Ensure batteries are fully charged and not damaged. Move to a less obstructed area to improve range. Reset the device by turning it off and on. Clean the antenna and avoid water exposure. For persistent issues, refer to the manual or contact Motorola support for assistance.

11.3 General Maintenance FAQs

Regularly clean the walkie talkie with a soft cloth to prevent dust buildup. Store it in a dry, cool place to avoid moisture damage. Update firmware periodically for improved performance. Check battery health and replace if necessary. Avoid extreme temperatures and physical stress. For long-term storage, remove batteries to prevent leakage. Refer to the manual for detailed care instructions to ensure longevity and optimal functionality of your Motorola walkie talkie.

Mastering your Motorola walkie talkie involves regular updates, proper storage, and safe handling. Follow the manual’s guidelines for optimal performance and longevity of your device.

12.1 Summary of Key Points

This manual provides a comprehensive guide for Motorola walkie talkie users, covering essential topics like safety, installation, basic operations, and advanced features. It emphasizes proper setup, usage, and maintenance to ensure optimal performance. By following the instructions and tips outlined, users can maximize their device’s functionality and longevity, ensuring reliable communication in various settings.

12.2 Best Practices for Optimal Use

For optimal performance, always read the manual thoroughly and follow safety guidelines. Regularly clean the device, store it properly, and use original Motorola accessories. Charge batteries correctly and avoid extreme temperatures. Familiarize yourself with advanced features like channel programming and privacy settings. Practice efficient communication techniques and ensure all users are on the same settings. By adhering to these practices, you can extend the lifespan and reliability of your Motorola walkie talkie.

Additional Resources

Explore online tutorials, downloadable guides, and community forums for further assistance. Visit Motorola’s official website for the latest manuals and troubleshooting tips to enhance your experience.

13.1 Online Tutorials and Guides

Access a wealth of online resources, including video tutorials and step-by-step guides, to master your Motorola Walkie Talkie. Websites like YouTube offer detailed setup and usage videos for models like the T600 H2O. Additionally, official Motorola forums and third-party sites provide troubleshooting tips and advanced feature explanations. These resources are ideal for both new users and experienced professionals seeking to optimize their device’s performance and explore its full potential.

13.2 Downloading the Latest Manual

Download the latest Motorola Walkie Talkie manual from trusted sources like ManualsLib or Motorola’s official website. These manuals are available in PDF format, ensuring easy access to detailed instructions, troubleshooting guides, and feature updates. Simply search for your specific model, such as the T600 H2O or T42, and follow the download prompts. This ensures you have the most current information to optimize your device’s performance and resolve any issues efficiently.

13.3 Community Forums and Support Groups

Join Motorola walkie talkie community forums and support groups to connect with experts and users. Platforms like ManualsLib and Motorola Solutions offer discussions, troubleshooting tips, and advice. These forums are ideal for resolving issues, sharing experiences, and learning optimal usage techniques. Active communities provide updated information on software, accessories, and best practices, ensuring you maximize your device’s potential and stay informed about the latest features and updates.

instruction manual for electrolux washing machine

Electrolux Washing Machine: Instruction Manual Overview

The Electrolux washing machine instruction manual is your comprehensive guide. It covers everything from initial setup to troubleshooting common issues.
Understanding this manual ensures optimal performance and longevity of your appliance.
Refer to it for safety guidelines, operating instructions, and maintenance tips.

Electrolux washing machines are renowned for their innovative design and high-quality performance, catering to diverse laundry needs.
This introduction provides an overview of the key features and benefits of Electrolux washers.
Electrolux aims to simplify your laundry routine while delivering exceptional cleaning results.
Each model incorporates advanced technology and user-friendly controls.
From energy-efficient operation to specialized wash cycles, Electrolux washing machines are designed for modern living.
This guide will help you understand the unique aspects of your Electrolux washer.
Familiarizing yourself with its features ensures efficient and effective use.
Electrolux offers a range of models, each with specific functionalities.
Whether you have a front-load or top-load machine, this manual will provide tailored guidance.
Discover how Electrolux washing machines can enhance your laundry experience.
Learn about the various programs, settings, and maintenance tips to keep your machine running smoothly.
Electrolux is committed to providing reliable and durable appliances.
By following the instructions in this manual, you can maximize the lifespan of your washing machine.

Understanding Your Model Number

Identifying your Electrolux washing machine’s model number is crucial for accessing specific information and support. The model number is a unique identifier that helps you find the correct manual, replacement parts, and troubleshooting guides.
This alphanumeric code contains valuable details about your machine’s features, specifications, and manufacturing date.
Typically, the model number is located on a sticker or plate affixed to the washing machine.
Common locations include the inside of the door, the back panel, or the side of the machine.
Once you locate the model number, you can use it to search for specific resources on the Electrolux website.
This will provide access to detailed product information, including the user manual and parts diagrams.
Knowing your model number also streamlines the process of ordering replacement parts.
Ensure you input the correct model number when searching for components to guarantee compatibility.
If you encounter any issues with your washing machine, having the model number readily available will assist customer service representatives in providing accurate support.
Take a moment to locate and record your Electrolux washing machine’s model number for future reference.

Safety Information and Installation

Prioritize safety during Electrolux washing machine installation. Review all safety precautions before operating the machine. Proper installation ensures safe and efficient operation.
Always follow the guidelines for grounding and electrical connections.

Important Safety Precautions

Before operating your Electrolux washing machine, carefully review these important safety precautions to prevent injury or damage.
Ensure the machine is properly grounded to a polarized 3-prong outlet, never removing the third grounding prong.
If the washer is moved, have it checked and reinstalled by a qualified technician.
Never wash items that have been cleaned with flammable liquids like gasoline, kerosene, or cleaning solvents.
These substances can create a fire or explosion hazard.
Do not wash items containing whalebones, torn material, or lacking hems.
Always unplug the appliance before performing any maintenance or cleaning.
Keep the area around the washer free from obstructions.
Supervise children when they are near the washing machine.
Do not allow children to play with, on, or inside the appliance.
Use only detergents specifically designed for washing machines, following the manufacturer’s instructions.
Avoid overloading the washing machine to prevent damage and ensure proper cleaning.
In case of a red light error or any malfunction, immediately unplug the machine and consult the user manual or contact a qualified technician for assistance.

Proper Installation Procedures

Correct installation is crucial for the safe and efficient operation of your Electrolux washing machine.
Begin by selecting a firm, level surface capable of supporting the machine’s weight when fully loaded.
Ensure adequate space around the washer for ventilation and maintenance access.
Connect the water inlet hoses securely, using new hoses to prevent leaks.
Attach the drain hose to a standpipe or laundry tub, ensuring it is properly secured to avoid dislodging during operation.
Remove all shipping bolts and packing materials from the back of the machine before use; failure to do so can cause severe damage.
Level the washing machine by adjusting the leveling feet until the machine sits firmly and does not rock.

This prevents excessive vibration and noise during operation.
Connect the power cord to a properly grounded electrical outlet.
Do not use extension cords or adapters.
Turn on the water supply and check for leaks at all connections.
Run a test cycle to ensure proper operation and drainage.
If installing on a plinth or stacking a dryer on top, use the appropriate accessories as specified in the manual.

Grounding Instructions

Proper grounding is essential for safety and to prevent electrical shock when operating your Electrolux washing machine.
The washing machine must be connected to a properly grounded and polarized 3-prong outlet.
Never remove the third grounding prong from the power cord plug, as this could compromise safety.
If you do not have a properly grounded outlet, consult a qualified electrician to install one.
Do not ground the washing machine to a gas pipe or water pipe.
The electrical power cord must be plugged directly into the outlet, avoiding the use of extension cords or adapters.
Regularly inspect the power cord for any signs of damage, and replace it if necessary.
In the event of an electrical storm, it is recommended to unplug the washing machine to protect it from power surges.
Ensure the outlet is easily accessible so the washing machine can be quickly disconnected in case of emergency.
If you are unsure about proper grounding procedures, consult a qualified electrician or refer to your local electrical codes.
Ignoring grounding instructions can lead to serious injury or death.
Always prioritize safety when installing and operating electrical appliances.

Operating Instructions

This section provides detailed instructions on how to properly operate your Electrolux washing machine.
Learn about control panel functions, wash cycles, detergent usage, and loading procedures for optimal cleaning performance and fabric care.

Control Panel Functions

The control panel is the central hub for operating your Electrolux washing machine.
Familiarizing yourself with its functions is essential for efficient and customized laundry cycles.
Typically, the panel includes a power button to turn the machine on and off.
A cycle selector knob or buttons allow you to choose from various wash programs like “Delicates,” “Normal,” “Heavy Duty,” and “Quick Wash.”
Many models also feature temperature settings (cold, warm, hot) and spin speed options (low, medium, high).

Additional buttons might include a start/pause button to begin or temporarily stop a cycle.
A delay start option allows you to schedule a wash to begin at a later time.
Some machines have a signal volume control or mute function.
A display screen provides information such as the remaining cycle time and any error codes.
Understanding each function ensures you can effectively tailor your wash to specific needs.
Always refer to your specific model’s manual for exact button labels and functions.

Selecting the Appropriate Wash Cycle

Choosing the right wash cycle is crucial for optimal cleaning and garment care.
Electrolux washing machines offer various cycles designed for specific fabric types and soil levels.
The “Normal” or “Cotton” cycle is suitable for everyday laundry items like shirts and jeans.
The “Delicates” cycle uses a gentler wash action and lower spin speed for lingerie and fine fabrics.
The “Permanent Press” cycle is ideal for wrinkle-resistant clothing.
The “Heavy Duty” cycle provides a more powerful wash for heavily soiled items like towels and work clothes.

For quick washes, the “Quick Wash” cycle is a time-saving option.
Some models also feature specialized cycles like “Sanitize” for killing bacteria or “Allergen” for removing allergens.
Always check the care label of your garments before selecting a cycle.
Consider the soil level when choosing a cycle, using a heavier cycle for heavily soiled items.
Overloading the machine can reduce washing effectiveness.
Consult your machine’s manual for detailed descriptions of each cycle and recommended usage.

Detergent and Additive Usage

Using the correct detergent and additives is essential for effective washing and preventing damage to your Electrolux washing machine.
Always use High Efficiency (HE) detergent in HE washing machines.
HE detergents produce less suds, which prevents buildup and ensures proper rinsing.
Follow the detergent manufacturer’s instructions for the correct amount to use based on load size and soil level.
Using too much detergent can lead to excessive suds and poor rinsing.
Additives such as fabric softener, bleach, and stain removers can enhance cleaning and garment care.
Add fabric softener to the designated compartment in the dispenser drawer.
Do not overfill the fabric softener compartment, as this can cause dispensing issues.
Use chlorine bleach sparingly and only when necessary, as it can weaken fabric fibers.
Add bleach to the designated compartment or dilute it with water before adding it to the wash.
Stain removers can be added directly to the drum or pre-treated on garments.
Always follow the instructions on the additive’s packaging for proper usage and safety precautions.
Avoid mixing different additives together, as this can create harmful chemical reactions.

Loading the Washing Machine

Properly loading your Electrolux washing machine is crucial for optimal cleaning and preventing damage to your appliance.
Avoid overloading the washing machine, as this can reduce cleaning effectiveness and strain the motor.
Check the recommended load capacity in your user manual and do not exceed it.
Distribute the laundry evenly inside the drum to maintain balance during the wash cycle.
Avoid washing single heavy items, such as rugs or blankets, as they can cause imbalance and damage the machine;
Mix large and small items to ensure proper distribution.

Before loading, check all pockets for loose items such as coins, keys, or paper.
These items can damage the washing machine or clog the drain.
Fasten hooks, close zippers, and tie drawstrings to prevent tangling and damage to other garments.
Place delicate items in a mesh laundry bag to protect them from abrasion.
Unfold items before loading to allow detergent and water to circulate effectively.
Do not pack the drum too tightly, as this restricts water flow and reduces cleaning performance.
Leave enough space for the laundry to move freely during the wash cycle.

Maintenance and Troubleshooting

Proper maintenance ensures your Electrolux washing machine operates efficiently.
Troubleshooting common issues can save time and money.
Regular care extends the lifespan of your appliance, preventing costly repairs.

Cleaning the Drum and Filters

Maintaining the cleanliness of your Electrolux washing machine’s drum and filters is crucial for optimal performance and longevity.
Regular cleaning prevents the buildup of detergent residue, lint, and other debris that can hinder washing efficiency and cause unpleasant odors.
To clean the drum, periodically run a self-clean cycle or a hot water cycle with an empty drum and a washing machine cleaner. This helps to remove any accumulated residue and sanitize the drum interior.
For the filters, typically located near the bottom front of the machine, consult your user manual for specific instructions on how to access and clean them.
Remove any lint, hair, or other particles trapped in the filters.
Rinse them thoroughly before reinserting.
Clogged filters can restrict water flow, leading to poor washing performance and potential damage to the machine.
Make sure to clean the drum and filters regularly, ideally every one to three months, depending on usage and water quality.
This simple maintenance task will help keep your Electrolux washing machine running smoothly and efficiently for years to come.

Troubleshooting Common Issues (e.g., E21 error code)

Encountering issues with your Electrolux washing machine can be frustrating, but most problems have simple solutions.
Consult your instruction manual for a comprehensive list of error codes and troubleshooting steps.
One common error is the E21 code, which typically indicates a drainage problem.
This could be due to a clogged drain filter, a kinked drain hose, or a malfunctioning drain pump.
Start by checking and cleaning the drain filter, ensuring it is free from debris.
Inspect the drain hose for any kinks or blockages, and straighten or clear it as necessary.
If the problem persists, the drain pump may need to be inspected or replaced by a qualified technician.
Other common issues include water not filling, the machine not starting, or unusual noises during operation.
The manual will provide specific troubleshooting steps for each of these problems.
Before contacting customer support, try the suggested solutions in the manual.
Many minor issues can be resolved quickly and easily, saving you time and potential repair costs.
Always disconnect the power before attempting any troubleshooting steps.

Routine Maintenance Tasks

To ensure your Electrolux washing machine operates efficiently and lasts longer, performing routine maintenance is essential.
Regular maintenance prevents the buildup of detergent residue, mold, and other contaminants that can affect performance.
One of the most important tasks is cleaning the detergent dispenser regularly.
Remove the dispenser drawer and rinse it thoroughly with warm water to remove any accumulated residue.
Also, clean the washing machine’s drum periodically to prevent the growth of mold and mildew.
Run an empty cycle with a washing machine cleaner or a solution of vinegar and water.
Check and clean the door seal after each wash to remove any lint or debris.
Wipe down the exterior of the machine with a damp cloth to keep it clean.
Inspect the water inlet hoses regularly for signs of wear or damage, and replace them if necessary.
Avoid overloading the washing machine, as this can strain the motor and other components.
Keep the area around the machine clean and free from clutter.
By following these simple maintenance tasks, you can keep your Electrolux washing machine in top condition.
Refer to your instruction manual for specific maintenance recommendations for your model.

sew eurodrive operating instructions

SEW-Eurodrive Operating Instructions: An Overview

This section provides a general introduction to SEW-Eurodrive operating instructions. These instructions are essential for ensuring the fault-free and safe operation of SEW-Eurodrive products. Furthermore‚ they cover a wide range of topics from installation to troubleshooting‚ and warranty information.

SEW-Eurodrive stands as a global leader in drive technology and automation solutions. With a rich history spanning 75 years‚ they’ve pioneered innovations like the world’s first gearmotor. Their core gearmotors are known for robust design‚ reliability‚ and versatility. SEW-Eurodrive’s operating instructions are designed to guide users through the proper installation‚ operation‚ and maintenance of their products. These manuals ensure optimal performance and longevity of the equipment. By adhering to these instructions‚ users can maximize efficiency while minimizing potential risks. These documents also provide necessary information regarding safety precautions‚ technical specifications‚ and troubleshooting procedures‚ ensuring a comprehensive understanding of the product’s functionality.

Safety Guidelines and Precautions

This section highlights crucial safety information for working with SEW-Eurodrive products. It’s vital to adhere to these guidelines to prevent injury and equipment damage‚ ensuring a safe working environment and long product lifespan.

General Safety Information

Prior to installation‚ operation‚ or maintenance of SEW-Eurodrive equipment‚ carefully review all safety guidelines and warnings. This section emphasizes the importance of understanding potential hazards associated with electrical and mechanical components. Ensure that only qualified personnel handle installation and repair‚ adhering to all relevant safety regulations. Always disconnect power before performing any maintenance. Use appropriate personal protective equipment (PPE). Never bypass safety devices. Report any unsafe conditions immediately. Familiarize yourself with emergency shutdown procedures. Regularly inspect equipment for wear and tear. Follow lock-out/tag-out procedures during maintenance. Proper grounding is essential to prevent electrical shock. Stay informed about the specific safety requirements for each SEW-Eurodrive product.

Safety Notes for Explosion-Proof Gear Units

These safety notes are specifically for SEW-Eurodrive explosion-proof gear units (R..7‚ F..7‚ K..7‚ S..7‚ SPIROPLAN W). Installation‚ operation‚ and maintenance must comply with explosion protection standards. Verify the gear unit’s suitability for the intended hazardous area. Use only approved accessories and spare parts. Avoid modifications that could compromise explosion protection. Ensure proper grounding to prevent static discharge. Regularly inspect for damage and leaks. Do not operate if damage is present. Maintain proper ventilation in the surrounding area. Follow specific instructions for cleaning and lubrication. Prevent the accumulation of dust or other flammable materials. Be aware of temperature limitations. Only qualified personnel trained in explosion protection should work on these units. Adhere to all local and national regulations.

Installation and Startup Procedures

This section details the proper electrical installation requirements for SEW-Eurodrive units. It also covers the recommended startup procedures and crucial considerations to ensure safe and efficient operation from the outset.

Electrical Installation Requirements

Electrical installation must be performed by qualified specialists‚ adhering to relevant accident prevention regulations. Refer to SEW-Eurodrive documentation before commencing installation. Proper wiring and grounding are critical for safety and optimal performance. Options and accessories from SEW-Eurodrive should be used exclusively with SEW-Eurodrive products. Verify correct voltage and current ratings before connecting the unit. Employ protective schemes for switching elements to minimize interference. Ensure proper isolation of power during installation. Consult the appropriate SEW-Eurodrive manuals for specific wiring diagrams and instructions. Failure to adhere to these guidelines may result in damage‚ malfunction‚ or personal injury‚ and may void the warranty.

Startup Procedures and Considerations

Before starting up any SEW-Eurodrive unit‚ carefully read and understand the relevant operating instructions. Verify that all electrical connections are secure and that the motor and brake are properly installed. Check for any obstructions that may impede the unit’s movement. Gradually increase the load during the initial startup phase. Monitor the unit’s performance for unusual noises or vibrations. If any issues arise‚ immediately stop the unit and consult the troubleshooting section of the manual. Ensure that all safety devices are functioning correctly before resuming operation. Pay close attention to the motor’s temperature and current draw during startup. Proper startup procedures are essential for maximizing the lifespan and reliability of your SEW-Eurodrive equipment.

Functional Safety Technology

SEW-Eurodrive’s functional safety technology ensures safe operation. The product must not perform safety functions without a higher-level system‚ unless specifically allowed. Always adhere to safety guidelines and documentation for correct operation.

Safety Functions and Higher-Level Systems

SEW-Eurodrive emphasizes the importance of integrating its products with higher-level safety systems to ensure comprehensive functional safety. Unless explicitly stated in the documentation‚ SEW-Eurodrive products should not perform safety functions independently. A higher-level safety system is required to monitor and control the safety-related aspects of the drive system.

These systems are designed to prevent hazardous situations and ensure the safe operation of machinery. Proper integration with safety PLCs‚ safety relays‚ or other safety controllers is crucial; Refer to the relevant SEW-Eurodrive manuals for specific instructions on connecting and configuring safety functions within the higher-level system. Correct implementation is vital for maintaining safety integrity and compliance with safety standards.

Available Documentation and Resources

SEW-Eurodrive provides a comprehensive suite of documentation and resources to support its products. This includes printed manuals‚ online resources‚ CAD data‚ product data‚ and software downloads to assist users.

Printed Manuals and Online Resources

SEW-Eurodrive offers a range of printed manuals for detailed product information. These manuals contain essential information for installation‚ operation‚ and maintenance. Furthermore‚ users can order printed manuals directly from SEW-Eurodrive for convenient access; The online resources offer a wealth of information‚ including downloadable manuals‚ application guides‚ and FAQs. The SEW-Eurodrive website provides a central hub for accessing this documentation. It ensures users have the necessary information for optimal product performance. Contact SEW-Eurodrive for further assistance or clarification. This documentation is crucial for understanding the safety aspects and operational procedures.

CAD Data‚ Product Data‚ and Software Downloads

SEW-Eurodrive provides a comprehensive suite of digital resources for its products. Users can access CAD data for integrating SEW-Eurodrive components into designs. Furthermore‚ product data sheets offer detailed specifications and performance metrics. Software downloads‚ including configuration tools and firmware updates‚ are also available. These resources streamline the design‚ implementation‚ and maintenance processes. Users can find CAD models and technical information online. This facilitates seamless integration and accurate system design. Order-specific packages are also accessible online. Contact SEW-Eurodrive for any assistance needed in locating specific digital resources. Utilizing these downloads ensures optimal product integration and performance.

Troubleshooting and Maintenance

This section focuses on common issues encountered with SEW-Eurodrive products and their corresponding solutions. Proper maintenance procedures are crucial for extending the lifespan and ensuring the reliable performance of your SEW-Eurodrive equipment.

Common Issues and Solutions

This section details the most frequent problems encountered while operating SEW-Eurodrive systems. It provides troubleshooting steps for issues such as motor failures‚ communication errors‚ and unexpected shutdowns. Furthermore‚ it explains how to diagnose the root cause of problems using error codes and diagnostic tools. Detailed solutions‚ including adjustments‚ repairs‚ and component replacements‚ are outlined to resolve these issues effectively. The section also covers preventative measures to minimize the recurrence of common problems. By following these guidelines‚ users can quickly identify and address malfunctions‚ minimizing downtime and maximizing the operational efficiency of SEW-Eurodrive equipment.

Warranty Information

This section outlines the terms and conditions of the SEW-Eurodrive limited warranty. It describes the coverage period‚ what is covered‚ and the procedures for making a warranty claim. It also describes what voids the warranty.

Rights to Claim Under Limited Warranty

To ensure fulfillment of rights under the limited warranty‚ it is essential to carefully read and understand the information provided in the documentation. SEW-Eurodrive emphasizes the importance of reviewing the warranty terms before commencing any work with the unit. Failure to adhere to the instructions and guidelines may affect warranty coverage. Please note that warranty claims may be voided without prior consultation with SEW-Eurodrive. Using an oil heater may only be permitted after contacting them. Additionally‚ using options and accessories from SEW-Eurodrive may only be used in combination with products from SEW-Eurodrive.

keurig single serve coffee maker instructions

Keurig single serve coffee maker instructions provide guidance on using machines, with

    step-by-step

guides for easy operation and maintenance, helping users to brew perfect cups of coffee every time with their Keurig machine always.

Understanding the Basics of Keurig Coffee Makers

To understand the basics of Keurig coffee makers, it’s essential to know how they work. Keurig machines use K-cup pods, which contain powdered dry coffee or tea, and require hot water to extract flavor. The process involves inserting a K-cup pod into the machine, selecting the desired settings, and waiting for the coffee to brew. Keurig coffee makers are designed to be user-friendly, with easy-to-follow instructions and minimal maintenance required. The machines are also relatively compact, making them a great option for small kitchens or offices. By understanding how Keurig coffee makers work, users can appreciate the convenience and versatility they offer. With a range of models available, from the Keurig Mini to larger machines, there’s a Keurig coffee maker to suit every need. Whether you’re a coffee lover or just looking for a quick and easy way to make a cup of coffee, Keurig machines are a great option. They are widely available and can be purchased online or in-store. Overall, Keurig coffee makers are a popular choice for many coffee drinkers.

Preparing a K-cup Pod in the Keurig Mini Brewer

Insert K-cup pod into the Keurig Mini Brewer and select settings for a perfect cup of coffee using the machine’s controls and features easily always.

Step-by-Step Guide to Using the Keurig K-Mini Single Serve Coffee Maker

To use the Keurig K-Mini Single Serve Coffee Maker, start by plugging in the machine and filling the water reservoir. Next, choose your favorite K-cup pod and insert it into the machine. Select your desired cup size using the control panel, and the machine will begin to brew your coffee. The Keurig K-Mini is a compact and easy-to-use coffee maker that is perfect for small kitchens or offices. With its simple and intuitive design, you can have a perfect cup of coffee every time. The machine also features a removable drip tray and a cord storage compartment, making it easy to clean and store. By following these simple steps, you can enjoy a delicious cup of coffee from the comfort of your own home using the Keurig K-Mini Single Serve Coffee Maker and its many convenient features.

Troubleshooting Common Issues with Keurig Single Serve Coffee Makers

Keurig issues include overflowing and short cups, resolved by

    checking

and adjusting the machine.

Resolving Problems with Overflowing and Short Cups of Coffee

Resolving problems with overflowing and short cups of coffee is crucial for optimal Keurig performance. Issues with coffee flow can be caused by a variety of factors, including clogged needles or improperly aligned K-cup pods. To resolve these issues, users can try descaling their Keurig machine or checking the water level to ensure it is at the recommended height. Additionally, ensuring the K-cup pod is properly seated and the lid is closed can help prevent overflowing and short cups. By following these simple steps, users can enjoy a perfectly brewed cup of coffee every time. Regular maintenance, such as cleaning and descaling, can also help prevent problems with overflowing and short cups. With proper care and maintenance, Keurig single serve coffee makers can provide years of reliable service and delicious coffee; Proper use and maintenance is key to resolving problems and enjoying great coffee.

Maintenance and Care of Keurig Single Serve Coffee Makers

Regular cleaning and descaling of Keurig machines is necessary for optimal performance and longevity always using fresh water.

Importance of Regular Cleaning and Descaling to Prevent Damage

Regular cleaning and descaling of Keurig machines is crucial to prevent damage and ensure optimal performance. The process involves removing mineral deposits and old coffee oils that can accumulate inside the machine. This can be done by running a mixture of water and descaling solution through the! machine. It is recommended to descale the machine every 3-6 months, depending on usage. Regular cleaning can be done by wiping down the exterior and interior of the machine with a damp cloth. This will help remove any splatters or spills that can cause damage to the machine. Additionally, descaling can help improve the taste of the coffee by removing any mineral deposits that can affect the flavor. By following these simple steps, users can help extend the life! of their Keurig machine and ensure it continues to function properly. A clean and well-maintained machine is essential for brewing great-tasting coffee.

Comparison of Keurig Single Serve Coffee Makers with Other Coffee Makers

Keurig single serve coffee makers are often compared to other types of coffee makers, such as drip brewers and French presses. One of the main advantages of Keurig machines is their convenience and ease of use. They allow users to quickly and easily brew a single cup of coffee, without having to measure out coffee grounds or clean up a messy brew process. In contrast, other coffee makers may require more effort and cleanup, but can also offer more control over the brewing process. Some users may prefer the flavor and flexibility of a drip brewer or French press, while others may appreciate the speed and convenience of a Keurig machine. Ultimately, the choice between a Keurig and another type of coffee maker will depend on the individual’s needs and preferences. By considering the features and benefits of each type of machine, users can make an informed decision and choose the best coffee maker for their lifestyle. This comparison can help users find the perfect coffee maker.