Aperture, Shutter Speed, and ISO: A Comprehensive Chart Guide
Navigating the exposure triangle demands understanding how aperture, shutter speed, and ISO interact; readily available PDF charts simplify this learning process, offering quick reference guides․
Understanding the Exposure Triangle
The exposure triangle – aperture, shutter speed, and ISO – forms the core of photographic control, dictating how light interacts with your camera’s sensor․ Mastering this interplay is crucial for achieving well-exposed and creatively compelling images․ Each element isn’t isolated; they’re interconnected, meaning adjusting one necessitates considering the others to maintain balanced exposure․
Aperture controls the lens opening, influencing depth of field and light intake․ Shutter speed determines how long the sensor is exposed to light, impacting motion blur․ ISO measures the sensor’s sensitivity to light, affecting image noise․
PDF charts visualizing these relationships are invaluable tools for beginners and experienced photographers alike․ These charts often illustrate how different combinations of settings affect exposure, providing a quick reference for various shooting scenarios․ They help demystify the complex interactions, enabling photographers to make informed decisions and achieve desired results efficiently․ Understanding this triangle unlocks creative potential․
What is Aperture?
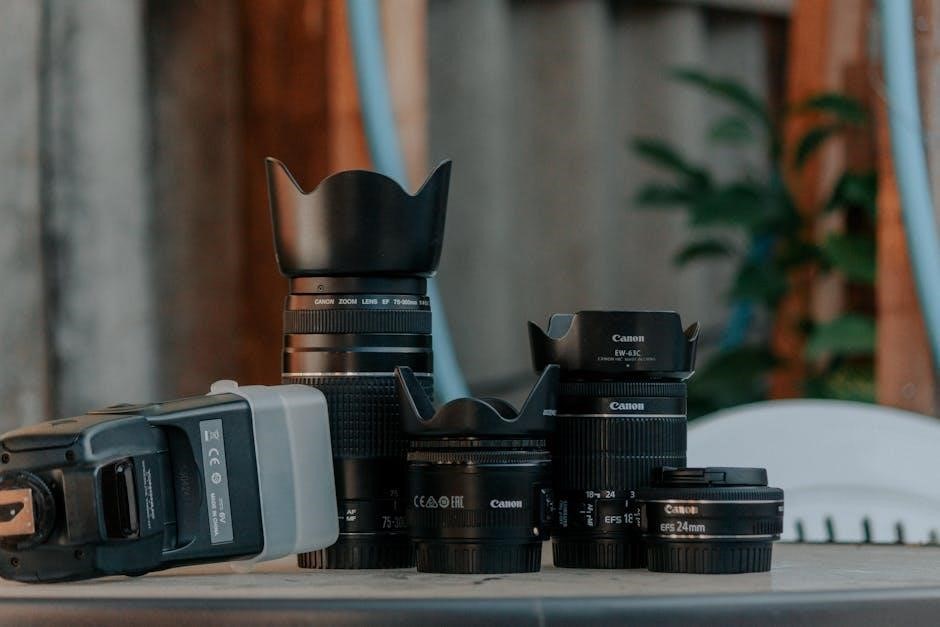
Aperture refers to the opening within a lens that controls the amount of light reaching the camera sensor․ It’s expressed in f-stops – like f/2․8, f/5․6, or f/16 – where a lower f-stop number indicates a wider opening, letting in more light, and a higher number signifies a narrower opening, reducing light intake․ This control directly impacts both exposure and depth of field․
A wider aperture (lower f-stop) creates a shallow depth of field, blurring the background and isolating the subject – ideal for portraits․ A narrower aperture (higher f-stop) yields a greater depth of field, keeping more of the scene in focus – perfect for landscapes․
PDF charts often visually represent the relationship between f-stops and their corresponding effects on depth of field and exposure, aiding in quick decision-making during shoots․ Mastering aperture is fundamental to controlling the look and feel of your photographs․
Aperture and f-stops
F-stops are the numerical representation of the aperture opening within a lens, crucial for controlling light and depth of field․ They operate on a logarithmic scale; each step doubling or halving the amount of light entering the camera․ Common f-stop values include f/1․4, f/2, f/2․8, f/4, f/5․6, f/8, and so on․
Understanding this scale is vital․ Moving from f/2․8 to f/4 halves the light, requiring a corresponding adjustment to shutter speed or ISO to maintain proper exposure․ PDF charts illustrating f-stop values and their light transmission equivalents are incredibly helpful for beginners․
Lower f-stops (e․g․, f/1․4) create shallower depths of field, while higher f-stops (e․g․, f/16) produce greater depth of field․ These charts visually demonstrate these relationships, simplifying the learning process and aiding in creative control․
Depth of Field Explained
Depth of field (DoF) refers to the portion of an image appearing acceptably sharp․ It’s heavily influenced by aperture; wider apertures (lower f-numbers like f/1․8) yield shallow DoF, blurring backgrounds – ideal for portraits․ Conversely, smaller apertures (higher f-numbers like f/16) maximize DoF, keeping more of the scene in focus – suited for landscapes․
Factors beyond aperture, like focal length and subject distance, also impact DoF․ Longer focal lengths and closer subject distances reduce DoF․ PDF charts often visually represent these interactions, showing how changing each parameter alters the area of sharpness․
Mastering DoF allows creative control, isolating subjects or showcasing expansive scenes․ Charts provide a quick reference, predicting DoF based on chosen settings, streamlining workflow and enhancing photographic vision․
What is Shutter Speed?
Shutter speed dictates how long the camera’s sensor is exposed to light, measured in seconds or fractions of a second․ It’s a crucial element of the exposure triangle, directly impacting motion depiction․ Faster shutter speeds (e․g․, 1/1000 sec) freeze action, ideal for sports or wildlife photography, while slower speeds (e․g․, 1 second) blur motion, creating a sense of movement or light trails․
Understanding shutter speed’s effect is vital for creative control․ PDF charts illustrating shutter speed ranges and their corresponding effects are invaluable resources․ These charts often correlate shutter speed with specific scenarios – freezing a bird in flight versus capturing silky water․
Proper shutter speed selection, alongside aperture and ISO, ensures well-exposed and visually compelling images; Charts simplify this process, offering a quick reference for achieving desired results․
Shutter Speed and Motion Blur
Motion blur occurs when a subject moves during the exposure, resulting in a streak or blur․ Slower shutter speeds exacerbate this effect, intentionally used for artistic expression – conveying speed or a sense of dynamism․ Conversely, faster shutter speeds minimize motion blur, “freezing” the action․
PDF charts detailing shutter speed and motion blur relationships are incredibly helpful․ They visually demonstrate how different speeds impact moving subjects, aiding in predicting and controlling the outcome․ These charts often showcase examples, like blurred car headlights or frozen water droplets․
Mastering this relationship requires practice and understanding your camera’s capabilities․ Charts provide a solid foundation, allowing photographers to confidently select shutter speeds to achieve desired levels of motion blur or sharpness․
Freezing Action with Fast Shutter Speeds
To capture fast-moving subjects with clarity, photographers employ fast shutter speeds – typically 1/500th of a second or faster․ This minimizes motion blur, effectively “freezing” the action in time․ Sports photography, wildlife photography, and capturing children at play all benefit from this technique․
PDF charts illustrating shutter speed and subject velocity are invaluable tools․ They provide a quick reference for determining the appropriate shutter speed needed to freeze specific actions, like a bird in flight or a speeding vehicle․ These charts often correlate speed with recommended settings․
However, remember that faster shutter speeds require more light․ Consequently, you may need to increase ISO or widen the aperture to maintain proper exposure․ Understanding this interplay, often visualized in comprehensive charts, is crucial for successful action photography․
What is ISO?
ISO measures your camera sensor’s sensitivity to light․ A lower ISO (like 100) means less sensitivity, requiring more light for a proper exposure, resulting in cleaner images․ Higher ISO settings (like 3200 or 6400) increase sensitivity, allowing you to shoot in darker conditions, but at the cost of image quality․
PDF charts detailing ISO ranges and their corresponding image noise levels are incredibly helpful․ These charts visually demonstrate the trade-off between brightness and noise, guiding photographers toward optimal settings for various scenarios․ They often include example images at different ISO values․
Choosing the right ISO is a balancing act․ While higher ISOs enable shooting in low light, they introduce digital noise – graininess that degrades image quality․ Understanding your camera’s ISO performance, often detailed in review resources and summarized in charts, is key․
ISO and Image Noise
Increasing the ISO amplifies the signal from your camera’s sensor, but it also amplifies noise – random variations in color and brightness․ This manifests as graininess in your images, reducing detail and clarity․ The relationship isn’t linear; doubling the ISO doesn’t necessarily double the noise․
PDF charts illustrating ISO levels alongside corresponding noise examples are invaluable․ These charts often showcase images taken at various ISO settings, allowing you to visually assess the acceptable noise level for your work․ They help determine your camera’s “usable” ISO range․
Modern cameras handle high ISOs better than older models, but noise remains a factor․ Noise reduction software can mitigate the issue, but it can also soften details․ Understanding your camera’s noise performance, often summarized in downloadable charts, is crucial for informed decisions․
Base ISO and Optimal Settings
Every camera has a base ISO, typically ISO 100, offering the cleanest image quality with the least amount of noise․ Shooting at base ISO whenever possible is ideal, providing maximum dynamic range and detail․ However, maintaining a suitable shutter speed and aperture often necessitates increasing ISO․
PDF charts detailing optimal ISO settings for various lighting conditions are incredibly helpful․ These charts often suggest starting points, acknowledging that “optimal” is subjective and depends on your artistic vision and camera capabilities․ They can guide you towards balancing image quality and exposure․
Understanding your camera’s sensor size influences optimal ISO․ Larger sensors generally perform better at higher ISOs․ Charts often specify settings for different sensor sizes․ Experimentation is key; use charts as a starting point, then fine-tune based on your results and preferences․
The Relationship Between Aperture, Shutter Speed, and ISO
These three settings form the exposure triangle, intrinsically linked in determining image brightness․ Altering one necessitates adjusting others to maintain proper exposure․ Aperture controls light intake through the lens, shutter speed dictates how long the sensor is exposed, and ISO amplifies the signal․
A wider aperture (lower f-stop) or slower shutter speed lets in more light, potentially requiring lower ISO․ Conversely, a narrow aperture (higher f-stop) or faster shutter speed demands higher ISO to compensate․ PDF charts visually represent these relationships, demonstrating equivalent exposures with different combinations․
Mastering this interplay is crucial for creative control․ Charts often illustrate how changing one setting impacts the others, aiding in understanding exposure stops․ They help visualize how to achieve desired effects – depth of field, motion blur, or noise levels – by strategically adjusting the triangle’s elements․
Exposure Stops Explained
Exposure stops represent a doubling or halving of light reaching the sensor․ Each stop significantly impacts brightness; increasing by one stop doubles the light, while decreasing halves it․ Understanding stops is fundamental to controlling exposure accurately․
Aperture changes in full stops (e․g․, f/2․8 to f/4), shutter speed in increments like 1/60 to 1/30, and ISO typically doubles with each full stop increase (e․g․, ISO 100 to ISO 200)․ PDF charts often visually map these changes, illustrating the effect of each stop on overall exposure․
These charts are invaluable for quickly calculating equivalent exposures․ For instance, a one-stop increase in aperture can be offset by a one-stop decrease in shutter speed, maintaining consistent brightness․ Mastering exposure stops, aided by visual guides, unlocks creative control and consistent results․
One-Stop Changes in Aperture
A one-stop change in aperture represents a doubling or halving of the light entering the camera․ Moving from f/2․8 to f/4 reduces light by one stop, requiring compensation elsewhere․ Conversely, shifting from f/4 to f/2․8 increases light by one stop․
PDF charts detailing aperture values visually demonstrate these changes․ They clearly show the f-stop scale (e․g․, f/1․4, f/2, f/2․8, f/4, f/5․6) and the corresponding light transmission․ Each step impacts depth of field; wider apertures (smaller f-numbers) create shallower depth of field․
Understanding these relationships is crucial for maintaining proper exposure․ A one-stop aperture change necessitates a corresponding adjustment in shutter speed or ISO to preserve brightness․ Charts simplify this process, offering a quick reference for photographers seeking precise control․
One-Stop Changes in Shutter Speed
A one-stop alteration in shutter speed either doubles or halves the duration of light exposure on the sensor․ Transitioning from 1/125 sec to 1/60 sec decreases the exposure time by one stop, demanding adjustment elsewhere․ Shifting from 1/60 sec to 1/125 sec increases it by one stop․
PDF charts illustrating shutter speed sequences visually clarify these shifts․ They display common speeds (e․g․, 1/8000, 1/2000, 1/1000, 1/500, 1/250) and their light-gathering capacity․ Each step influences motion depiction; faster speeds freeze action, while slower speeds introduce motion blur․
Mastering these connections is vital for achieving desired effects․ A one-stop shutter speed change requires a corresponding adjustment in aperture or ISO to maintain consistent brightness․ Charts provide a handy reference for photographers aiming for accurate exposure control․
One-Stop Changes in ISO

Adjusting ISO by one stop effectively doubles or halves the sensor’s sensitivity to light․ Moving from ISO 100 to ISO 200 increases sensitivity by one stop, allowing for faster shutter speeds or narrower apertures in low-light scenarios․ Conversely, decreasing from ISO 200 to ISO 100 reduces sensitivity․
Comprehensive PDF charts often showcase standard ISO values (e․g․, 50, 100, 200, 400, 800, 1600) and their impact on image brightness․ However, each doubling introduces potential image noise or grain, particularly at higher settings․ Understanding this trade-off is crucial․
Photographers utilize ISO adjustments to balance exposure and image quality; Charts help visualize the relationship between ISO, shutter speed, and aperture, enabling informed decisions․ Careful consideration of noise levels is essential when increasing ISO for optimal results․
Aperture, Shutter Speed, ISO Chart (Example)
A typical chart organizes settings into columns: Aperture (f-stops like f/2․8, f/4, f/5․6), Shutter Speed (1/200s, 1/100s, 1/50s), and ISO (100, 200, 400)․ Rows demonstrate combinations achieving similar exposure levels․ Many PDF versions visually represent exposure stops, showing how changes in one setting necessitate adjustments in others․
For instance, a chart might illustrate that f/2․8, 1/200s, ISO 100 yields the same exposure as f/4, 1/100s, ISO 200․ These charts are invaluable for beginners learning the exposure triangle, providing a quick reference for balancing settings․
Downloadable PDF charts often include notes on depth of field (affected by aperture) and motion blur (affected by shutter speed), enhancing their educational value․ They serve as practical tools for photographers seeking creative control․

Using Aperture Priority Mode
Aperture Priority (Av or A) mode lets you select the aperture (f-stop), controlling depth of field, while the camera automatically chooses the shutter speed for proper exposure․ This is ideal when depth of field is crucial – portraits needing blurred backgrounds or landscapes demanding sharpness throughout․
Referencing an aperture-shutter speed-ISO chart PDF helps understand how the camera adjusts shutter speed based on your chosen aperture and ISO․ If the automatically selected shutter speed is too slow, increasing ISO (consulting the chart for a one-stop increase) can maintain sharpness and prevent motion blur․
Mastering this mode bridges the gap between automatic and manual control, offering creative flexibility․ Charts provide a visual guide to anticipate camera behavior and fine-tune settings for desired results, enhancing photographic skill․
Using Shutter Priority Mode
Shutter Priority (Tv or S) mode empowers you to dictate the shutter speed, freezing action or creating motion blur, while the camera automatically adjusts the aperture for correct exposure․ This is perfect for sports photography or capturing silky smooth waterfalls․
Utilizing an aperture-shutter speed-ISO chart PDF becomes invaluable here․ It illustrates how the camera alters aperture to compensate for your chosen shutter speed and ISO․ If the resulting aperture is too narrow, limiting light, increasing ISO (guided by the chart) can broaden the aperture and maintain brightness․
This semi-automatic mode offers a stepping stone towards full manual control, allowing experimentation with motion while maintaining proper exposure․ Charts provide a quick reference to predict camera settings and achieve desired creative effects, improving photographic expertise․
When to Use Manual Mode
Manual mode grants complete creative control, demanding you set aperture, shutter speed, and ISO independently․ It’s essential when automatic modes fail, like in challenging lighting scenarios or when a specific creative vision requires precise control over exposure;
Aperture-shutter speed-ISO chart PDFs are indispensable in manual mode․ They serve as a starting point, helping you estimate initial settings based on the scene’s lighting conditions․ Understanding exposure stops, detailed in these charts, allows for deliberate adjustments․
Mastering manual mode requires practice and a solid grasp of the exposure triangle․ Charts facilitate this learning process, enabling photographers to predict the impact of each setting and achieve consistent, desired results, ultimately unlocking full creative potential․
Practical Scenarios and Settings
Diverse photographic situations necessitate varied settings; a handy aperture-shutter speed-ISO chart PDF becomes invaluable․ For landscapes, prioritize depth of field with a smaller aperture (f/8-f/16), a moderate shutter speed (1/125s ⎼ 1/250s), and low ISO (100-200) for optimal clarity;
Portraiture benefits from wider apertures (f/1․8-f/5․6) to create pleasing bokeh, faster shutter speeds (1/100s — 1/200s) to freeze subject movement, and moderate ISO (200-800) to balance light and noise․
Action photography demands fast shutter speeds (1/500s or faster) to freeze motion, a wider aperture (depending on light) and increased ISO (800-3200+) to compensate․ Charts provide quick references, but adaptability remains key, adjusting settings based on real-time conditions․
Landscape Photography Settings
Achieving stunning landscapes relies on maximizing depth of field and sharpness; a detailed aperture-shutter speed-ISO chart PDF is a crucial tool․ Typically, landscapes thrive with a smaller aperture, such as f/8 to f/16, ensuring foreground to background clarity․ Shutter speed generally falls between 1/125s and 1/250s, though slower speeds with a tripod are common for low-light conditions․
Keep ISO as low as possible – ideally 100 or 200 – to minimize noise and preserve detail․ Utilizing a tripod is highly recommended for slower shutter speeds, preventing blur․ Reviewing a chart helps quickly recall these settings, but always adjust based on available light and desired effect․
Portrait Photography Settings
Capturing compelling portraits often prioritizes a shallow depth of field, beautifully blurring the background; a handy aperture-shutter speed-ISO chart PDF can streamline this process․ Wide apertures, like f/1․8 to f/5․6, are favored to isolate the subject․ Shutter speed should be fast enough to avoid motion blur – typically 1/125s or faster, depending on the subject’s movement․
ISO settings depend on lighting conditions; aim for the lowest possible value (100-400) to maintain image quality․ In lower light, increasing ISO may be necessary, but be mindful of potential noise․ A chart provides a quick reference, but artistic vision and subject needs should always guide final adjustments․
Action Photography Settings
Freezing fast-paced action demands prioritizing shutter speed; a comprehensive aperture-shutter speed-ISO chart PDF serves as an invaluable tool․ Shutter speeds of 1/500s, 1/1000s, or even faster are often necessary to eliminate motion blur․ Consequently, a wider aperture (e;g․, f/2;8 to f/5․6) is frequently used to allow sufficient light to reach the sensor at these high speeds․
ISO will likely need to be increased to compensate, potentially introducing noise․ Balancing ISO with shutter speed and aperture is crucial․ A chart offers a starting point, but real-time adjustments based on the specific action and lighting are essential for sharp, dynamic results․ Remember to prioritize capturing the moment!
Finding and Utilizing PDF Charts
Numerous online resources offer downloadable aperture, shutter speed, and ISO chart PDF guides․ A quick web search reveals options from photography blogs, camera manufacturers, and educational websites․ These charts typically present recommended settings for various shooting scenarios – landscapes, portraits, sports, and low-light conditions․
Utilizing these charts effectively involves understanding they are starting points, not rigid rules․ Factors like specific lens, camera model, and desired creative effect necessitate adjustments․ A chart provides a visual reference for the exposure triangle’s interplay, aiding in quicker decision-making in the field․ Experimentation and practice, guided by the chart, are key to mastering exposure․
Resources for Further Learning
Beyond simple aperture, shutter speed, and ISO chart PDF guides, a wealth of resources exists for deepening your photographic knowledge․ Websites like Digital Photography School and Photography Life offer in-depth articles, tutorials, and forums dedicated to mastering exposure․ YouTube channels, such as Peter McKinnon and Mike Browne, provide engaging video lessons on these core concepts․
Consider enrolling in online photography courses on platforms like Skillshare or Udemy for structured learning․ Books focusing on photographic techniques, particularly those covering the exposure triangle, are invaluable․ Remember to actively practice and experiment with different settings, referencing your charts as a starting point, to solidify your understanding and develop your photographic eye․
Troubleshooting Exposure Issues
When images are consistently over or underexposed, revisit your aperture, shutter speed, and ISO settings, referencing a handy chart PDF for quick adjustments․ Dark images often indicate underexposure – lower your shutter speed, widen your aperture (lower f-stop), or increase ISO; Conversely, bright, washed-out images suggest overexposure; raise shutter speed, narrow aperture, or reduce ISO․
Pay attention to histograms; they visually represent tonal distribution․ A histogram skewed to the left indicates underexposure, while a right-skewed histogram suggests overexposure․ Utilize exposure compensation in semi-automatic modes for fine-tuning․ Remember, understanding the interplay between these settings, aided by a chart, is crucial for resolving exposure problems․